Homemade Chicken Strips: Crispy, Healthy, Without Excess Fat
Master homemade chicken strips: half the fat, zero additives, maximum crispiness. Say goodbye to unhealthy frozen versions. Quick, easy recipe inside.
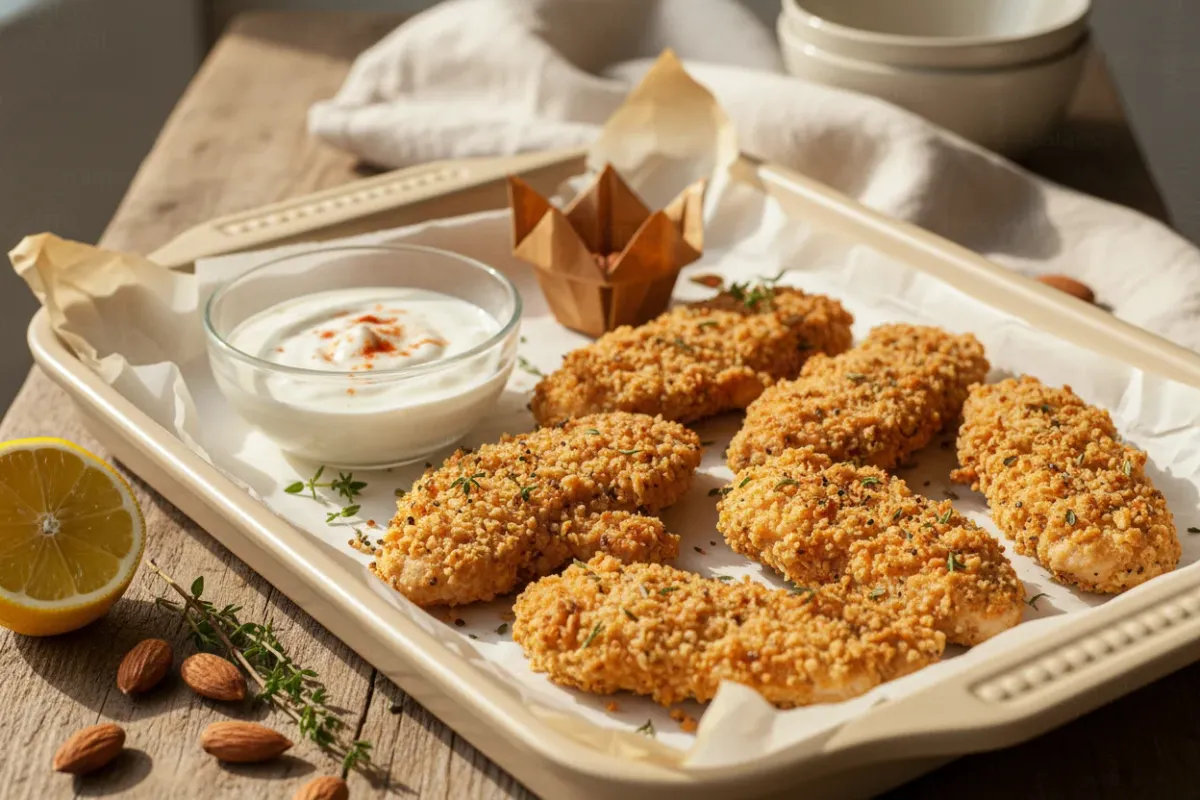
Frozen chicken strips from the store are convenient, quick, and… completely unpredictable in their ingredients. Beneath that crispy coating hides a generous dose of trans fats, sodium, and flavor enhancers that turn what seems like a "protein snack" into a calorie bomb. Once you make strips at home, you'll never want to go back to frozen ones. They come out crispy, juicy inside, and fit into any meal plan.
Why Homemade Strips Beat Store-Bought
The Fat Difference — More Than Double
According to a comparative analysis by Live Life Get Active, store-bought chicken tenders contain about 28.1 g of fat per serving, while the homemade version has only 11.3 g. If you compare a full meal with strips, the store-bought option delivers 54.7 g of fat, while the homemade one delivers just 13 g. The difference is enormous, and it's especially critical for those watching their daily calorie intake.
Sodium: The Hidden Threat
The same source shows that store-bought tenders contain 865 mg of salt per serving — significantly exceeding the recommended limit of 500 mg per meal. A full fast-food portion racks up 2,151 mg of sodium — more than the daily allowance (under 2,000 mg). Homemade strips? Just 260 mg for the entire meal. Controlling salt means controlling water retention, blood pressure, and overall well-being.
Cost — A Nice Bonus
Homemade preparation costs roughly $3.40 per serving for four people, while ready-made frozen tenders like Applegate Naturals cost $12.32 for 450 g. With regular consumption, the budget difference becomes significant — over a month, that's enough savings to buy a good protein powder or a bag of coconut flour.
Nutrition Facts for Homemade Chicken Strips
The exact numbers depend on the cooking method — oven-baked, pan-fried, or deep-fried. Here are approximate values per 100 g of the finished product for all three methods:
Oven-Baked Strips (panko, no oil in the breading)
| Metric | Per 100 g |
|---|---|
| Calories | ~160 kcal |
| Protein | 22 g |
| Fat | 3.5 g |
| Carbs | 10 g |
Pan-Fried Strips (2 cm of oil)
| Metric | Per 100 g |
|---|---|
| Calories | ~220 kcal |
| Protein | 20 g |
| Fat | 10 g |
| Carbs | 12 g |
Deep-Fried Strips
| Metric | Per 100 g |
|---|---|
| Calories | ~270 kcal |
| Protein | 18 g |
| Fat | 15 g |
| Carbs | 14 g |
The oven is the obvious favorite for calorie counters. At the same time, homemade strips in any format contain significantly less fat and sodium than their store-bought counterparts.
Basic Recipe: Crispy Oven-Baked Strips in 30 Minutes
This recipe is inspired by a method described by RecipeTin Eats — pre-toasting the breadcrumbs in the oven. This is the very trick that transforms baked strips from "soft and pale" into truly crispy.
Ingredients (serves 4)
- 500 g chicken breast or boneless, skinless thigh
- 1.5 cups panko (Japanese breadcrumbs)
- 1 egg
- 1 tbsp Dijon mustard
- 1 tbsp mayonnaise (can be replaced with Greek yogurt for a healthier version)
- 2 tbsp flour (all-purpose or rice flour for a gluten-free version)
- Salt, pepper, paprika, garlic powder — to taste
Step-by-Step Instructions
Step 1. Prepare the breading. Preheat the oven to 200 °C (400 °F). Spread the panko on a baking sheet and toast in the oven for 3–4 minutes until golden. This is the key step — pre-toasted breadcrumbs create a crunch that holds up even after cooling.
Step 2. Cut the chicken. Slice the chicken into strips about 2 cm (¾ inch) thick. Uniform thickness is important for even cooking. Strips that are too thin will dry out; strips that are too thick will remain raw inside.
Step 3. Prepare the batter. In a bowl, mix the egg, mustard, mayonnaise (or yogurt), flour, salt, and pepper. The mixture should be smooth and medium-thick. The mustard doesn't add a strong flavor, but it helps the breading "grip" the meat.
Step 4. Bread the strips. Dip each chicken strip into the batter, then roll it in the toasted panko, pressing the breadcrumbs firmly onto the surface. Press confidently — this is a recommendation given by virtually every professional recipe, including Feast and Farm: firmly pressing the breading and then letting it rest for 5 minutes helps the coating stay on during cooking.
Step 5. Bake. Place the strips on a parchment-lined baking sheet (or a wire rack — this allows air to circulate on all sides). Lightly spritz with olive oil spray. Bake for 15 minutes at 200 °C (400 °F), flip, and bake for another 5–7 minutes until golden brown.
Total time is about 30 minutes, of which active preparation takes no more than 15 minutes.
Secrets to the Perfect Crispy Coating
Potato Starch — The Secret Ingredient
As CJ Eats Recipes points out, potato starch has larger granules compared to cornstarch, which makes the breading stiffer and more shatteringly crisp — exactly what you need for real crunch. You can add 2 tablespoons of potato starch to the dry breading mix to enhance the texture.
Cold Water in the Batter
The same source recommends using cold water when mixing the batter — it helps the breading adhere better to the chicken. The principle is the same as in Japanese tempura: cold batter hitting a hot surface creates a more pronounced temperature contrast and, consequently, a crispier texture.
The "Shaggy" Breading Technique
To create that uneven, "shaggy" surface that delivers maximum crunch, you can sprinkle a small amount of water into the flour bowl and use your hands to form irregular clumps. These breading pieces turn into those crispy, craggy bits during baking or frying — the very ones everyone loves about restaurant-style strips.
Let the Breading Rest
After coating in the breading, let the strips sit for 5 minutes before placing them in the oven or skillet. During this time, the batter slightly dries and bonds with the breadcrumbs, preventing the breading from falling off during cooking.
Options for Different Diets
Keto Version
For a ketogenic diet, panko is replaced with crushed pork rinds — a hack recommended by Best Recipe Box. This gives you zero carbs in the breading while maintaining a crispy texture. An alternative is almond flour with Parmesan and spices.
Keto strips nutrition (per 100 g):
| Metric | Per 100 g |
|---|---|
| Calories | ~180 kcal |
| Protein | 25 g |
| Fat | 8 g |
| Carbs | 1 g |
Gluten-Free Version
Panko can be replaced with gluten-free breadcrumbs or finely ground cornmeal. According to Allrecipes testing, Applegate's gluten-free tenders with a corn flour-based breading took first place in a blind taste test — testers noted that the breading was "not too thick and perfectly crispy," and the meat-to-breading ratio was the best among all contestants. This proves that gluten-free breading is not a compromise but a fully viable alternative.
High-Protein Version for Meal Prep
For those who prepare meals several days in advance, oven-baked chicken breast strips are an ideal option. They store well in the refrigerator for 3–4 days and reheat nicely in a toaster oven or regular oven (a microwave will soften the breading). You can slice and bread the chicken in advance, freeze the strips on a baking sheet, then transfer them to a bag — you'll have your own "frozen strips," just without the unnecessary additives.
If You Do Fry: How to Do It Right
Sometimes you crave a real fried crispy crust — and that's perfectly fine. A mindful approach to eating doesn't mean completely avoiding frying; it means understanding how to minimize the downsides.
Choosing the Oil
For frying strips, use oil with a high smoke point — canola, refined sunflower, or grapeseed oil. As Best Recipe Box warns, olive oil has a low smoke point and is not suitable for deep frying — it will start to burn and release harmful compounds well before reaching the required temperature.
Oil Temperature
The optimal temperature is 175–190 °C (350–375 °F). This is a critically important parameter: oil that's too cool means the chicken will absorb fat and become heavy; oil that's too hot means the breading will burn on the outside while the meat stays raw inside. A cooking thermometer is an indispensable tool for control.
The Double-Fry Technique
A method used in restaurants: the first fry at 160 °C (320 °F) for 4 minutes — the chicken cooks through on the inside. Then the strips are removed and the oil is heated to 190 °C (375 °F). The second fry lasts 2 minutes — the breading turns golden and incredibly crispy. This is exactly the method CJ Eats Recipes recommends, and this technique delivers restaurant-quality results.
How Many Strips to Fry at Once
Don't overcrowd the pan. The optimal number is 3–5 pieces at a time. An overloaded pan sharply drops the oil temperature, and instead of frying, you end up stewing in grease. Between batches, let the oil return to the target temperature.
Serving and Sauces: Healthy Options
Classic dipping sauces for strips — ketchup, barbecue, ranch — are often loaded with sugar and calories. Here are alternatives that won't wreck your macros:
- Greek yogurt + garlic + dill — homemade ranch without the excess fat (about 30 kcal per serving)
- Honey mustard — Dijon mustard + a teaspoon of honey + lemon juice (about 25 kcal)
- Tomato salsa — tomatoes, onion, cilantro, lime — virtually zero calories
- Hummus — a great source of plant-based protein and fiber (about 70 kcal per 2 tbsp)
Common Mistakes When Cooking
The chicken isn't pounded. If the strips are of uneven thickness, the thin ones will dry out before the thick ones are cooked through. The solution — lightly pound the chicken to an even thickness before slicing.
The breading falls off. This usually means the chicken wasn't patted dry before breading, or the breaded strips weren't allowed to "rest" before cooking. Paper towels and 5 minutes of patience solve the problem.
Dry meat. Chicken breast is a very lean cut, and overheating easily dries it out. The internal temperature of cooked chicken should be 74 °C (165 °F). Remove the strips as soon as they reach this mark. Another trick — use thigh instead of breast: it's slightly fattier but significantly juicier and more forgiving of timing mistakes.
Breading that's too thick. More is not better. A thick layer of batter and breadcrumbs creates a "cushion" that absorbs oil. A thin, firmly pressed layer of panko is what you need.
Frequently Asked Questions
What oil is best for frying chicken?
Oil with a high smoke point — refined sunflower, canola, or grapeseed oil. Olive oil is not suitable for deep frying due to its low smoke point: it will start to burn before reaching the required temperature of 175–190 °C (350–375 °F).
Can you bake strips in the oven instead of frying?
Yes, and the result will be excellent if you pre-toast the panko in the oven for 3–4 minutes until golden. Baking at 200 °C (400 °F) takes about 20 minutes and reduces the fat content of the finished dish by 2–3 times compared to frying. For extra crunch, you can use a wire rack instead of a baking sheet — air will circulate around the strips on all sides.
How long should breaded chicken rest before frying?
About 5 minutes. During this time, the batter slightly dries and bonds more firmly with the breadcrumbs. It's a simple trick that noticeably reduces the risk of the breading falling off during cooking.
Why does fried chicken turn out dry?
Most often, the cause is overheating. The internal temperature of the chicken should reach 74 °C (165 °F), after which the strips should be removed immediately. The second common factor is oil that's too cool: the chicken sits in it too long, losing its juices. Using a thermometer is the best investment in juicy strips.
How many strips should you fry at once to keep the crust crispy?
The optimal number is 3–5 pieces at a time. When the pan is overcrowded, the oil temperature drops sharply, the breading doesn't set, and instead absorbs fat. Between batches, let the oil return to its working temperature — this takes 1–2 minutes.
This article is for informational purposes only and is not medical advice. Consult a doctor or dietitian before making dietary changes.